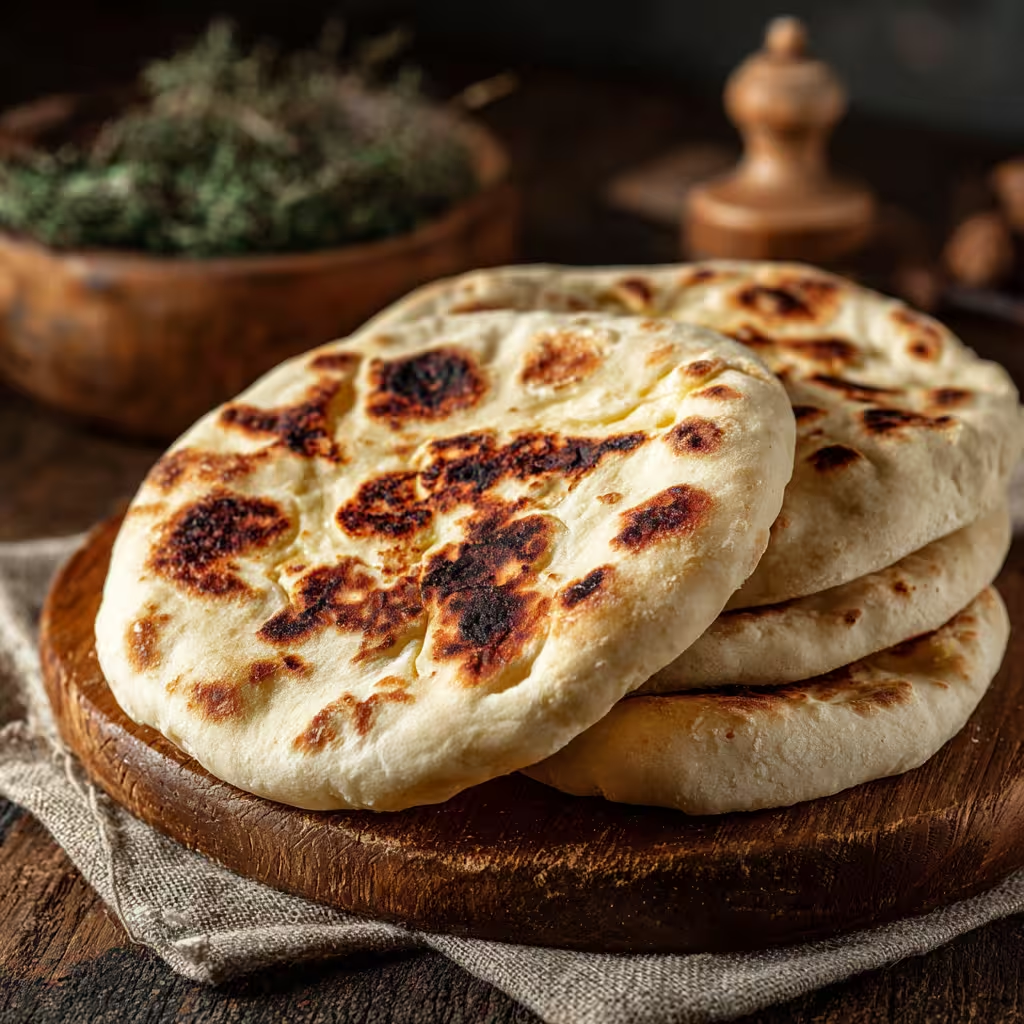
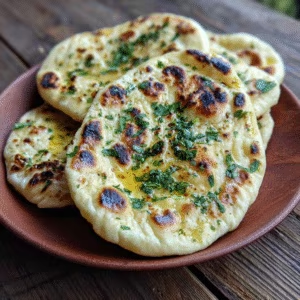
Pita Bread is a soft, round flatbread known for its signature pocket, making it perfect for stuffing, dipping, or serving alongside a variety of dishes. Popular in Middle Eastern and Mediterranean cuisines, pita is a versatile staple that has been enjoyed for centuries for its simple ingredients and satisfying texture.
Made from basic pantry staples like flour, water, yeast, and salt, pita bread is both easy to prepare and widely adaptable. During baking, the dough puffs up due to steam, creating the hollow center that forms its iconic pocket. This unique feature makes it ideal for filling with meats, vegetables, spreads, or salads, turning it into a convenient and delicious handheld meal.
Pita bread can be enjoyed in many ways. It’s commonly used for sandwiches such as wraps or stuffed pockets filled with grilled chicken, falafel, or fresh vegetables. It also pairs perfectly with dips like hummus, baba ganoush, or tzatziki, either served warm or lightly toasted for extra texture. Cut into wedges and baked or fried, pita can even be transformed into crispy chips for snacking or appetizers.
One of the reasons pita bread remains so popular is its versatility across meals. It can be part of breakfast, lunch, dinner, or even a quick snack. Whole wheat versions provide added fiber and nutrients, making it a healthier option for those looking to maintain a balanced diet.
In addition to its practicality, pita bread carries cultural significance and tradition. It has been a staple in many regions for generations, often baked fresh and shared among family and friends. Its ability to complement a wide range of flavors and cuisines has helped it become a global favorite.
Overall, pita bread is a simple yet essential food that combines tradition, convenience, and versatility. Whether used for dipping, stuffing, or snacking, it offers a delicious and satisfying way to enjoy a variety of meals.
Ingredients
- 3 1/2 cups all-purpose flour plus more for dusting
- 1 package active dry yeast about 2 1/4 teaspoons
- 1 teaspoon salt
- 1 tablespoon olive oil
- 1 1/4 cups warm water about 110°F
Instructions
- In a large bowl, combine yeast, warm water, and a pinch of sugar. Let sit for about 5 minutes until frothy.
- Add flour, salt, and olive oil to the yeast mixture. Stir until the dough begins to come together.
- Knead the dough on a lightly floured surface for about 8-10 minutes until smooth and elastic.
- Place the dough in a greased bowl, cover, and let rise until doubled in size, about 1 hour.
- Preheat oven to 475°F (245°C).
- Punch down dough and divide it into 8 equal pieces. Roll each piece into a ball, then flatten and roll into circles about 1/4 inch thick.
- Place pitas onto a baking sheet and bake for about 5-7 minutes, or until puffed and lightly golden.
- Remove from oven and cover with a towel to keep them soft. Serve warm or allow to cool completely.
Nutrition

Pita bread? More like pita headache! Took way too much time for something that I could just buy. Not worth it.
This recipe was great! The pitas came out fluffy and delicious. I used them for a nice veggie wrap. Definitely making again!
I’m so glad to hear that! I love using pitas for wraps too. What veggies did you add?
They sounded good but I tried a different recipe and it was a mess. Maybe I did something wrong. Not sure if I’ll try again.
I don’t know about this. Mine didn’t puff up at all, they were kinda flat. Maybe my yeast was old? Not sure what I did wrong.
Just okay. They were edible but not as good as store-bought ones. I guess I expected more. 🌯
Best pita EVER! The warm water and sugar really worked wonders. Thank you for sharing this recipe! Yum!!
Not gonna lie, I forgot to cover them with the towel after baking and they dried out. Learned my lesson—still tasty, just not as soft.
Absolutely love this recipe! The pitas turned out fluffy and perfect. Thank you!
I tried this too, but mine were kinda hard and not puffy at all. What did I do wrong?
I’m so happy to hear that! Fluffy pitas are the best! 🎉
My dough was a bit sticky even after adding flour. Maybe my warm water wasn’t warm enough? Still ended up edible and yummy though.
Easy to make but the taste was just… meh. I expected more flavor!
Do you really need warm water? I used water that was kinda lukewarm and my yeast didn’t get frothy. Flavor was meh, so I restarted. 🙁
Mine took a little longer to rise (more like 1h20) but the dough was great. Also, 475°F is no joke—keep an eye on them.
Good catch on the rise time—dough can definitely take longer depending on room temp. Glad yours turned out great! And yes, 475°F is intense; I usually watch them closely so they puff up without over-browning.
This was super easy! My kids loved helping with the kneading. Will make again!
That’s awesome! I love activities that get the kids involved in cooking. Pita bread is so fun to make, right? 🎉
This is how you make real pita bread! My family enjoyed it so much. 👏👏
I’m glad your family loved it! Pita bread is so versatile too. What did you serve it with?
Looks good, but isn’t it hard to make? I’ve tried before and mine always end up flat. 😩
I baked mine at 475°C by accident… yeah, they turned into crackers. 😂 So don’t do that. But if you follow the temperature, it should be great.
Okay but my dough was super sticky until I added more flour. Not sure if my water temp was off. Flavor is nice though, and they did puff.
I’m not much of a baker, but I followed this closely. Mine didn’t puff up like yours…what went wrong?
Baking can be tricky! Make sure your yeast is fresh and that your water isn’t too hot or too cold. Those are common mistakes. Keep trying, you’ll get it!
Maybe you squished the dough too much? I have that problem too sometimes. Just keep practicing, it will puff up eventually!
These remind me of store-bought but better. I’m giving 5 stars. also my family ate them all before they even cooled.
Um, I used whole wheat flour instead. Still turned out good? Really easy steps!
Weirdly, I got only 6 decent pitas even though I divided into 8. Maybe my circles were too thick? Otherwise, pretty good.
Great recipe, simple and quick! I added garlic powder for flavor, yum!
Garlic powder, huh? Isn’t that not traditional? My Pita Bread turns out fine without it. Just saying.
I love adding garlic powder too! It makes everything taste better. Thanks for sharing!
475°F is hot hot lol—my first batch browned too fast. But second try was better once I kept a closer eye. Still worth it.
I appreciate that it uses standard pantry stuff. Also 110°F is a good call. I always mess up temps, but the frothy yeast step saved me.
Pretty decent for first attempt! Although, they were kinda flat. Too much kneading???
Super simple. The kneading time (8-10 min) really matters—when I under-kneaded before, they didn’t puff. This time: perfect pockets.
Yes! I’ve noticed the same thing—if I rush the kneading, I don’t get the puff pockets. 8–10 minutes is the sweet spot for me too. Thanks for calling that out.
Interesting, but I feel like it’s mostly the oven temp / steam that makes them puff. I knead like 3-4 min and mine still puff, so maybe it varies? 🤷♂️
Took forever to rise! Not sure if I did it right. Ended up hard like a rock. Not great.
Baked mine on the grill instead, and they were delish! Happy face!
I’ve never used yeast before and it scared me a bit. Can you skip that part?
I messed up step 1 because I didn’t have “a pinch of sugar” (I used none). The yeast didn’t foam, so I started over. Once I did it right, it worked perfectly.
so easy lol. can’t believe it’s just yeast + flour. next time I’ll make extra.
My oven runs hot, so I lowered to 450°F and that fixed the burning risk. Puffing was better too.
Nice save! Lowering the temp makes sense if the oven runs hot—puffing + no burning is the dream.
Simple and tasty! My family was eating them before I could finish plating. The towel step really does help keep them soft.
Pitas didn’t puff up for me. Followed the instructions but yikes. Sad face.
Not gonna lie, 1/4 inch thick seems kinda thin. I tried it and they puffed nicely but went a little crispy by the edges. Still good for dipping.
I followed it exactly and they came out dense. Covering with a towel after baking helped, but I expected more pocket action.
These came out way puffier than I expected. Followed the 475°F and the 5–7 min timing almost exactly—perfect soft texture. Will make again!
Great flavor! The 475°F is no joke though—watch closely. Mine went golden fast around minute 4.
I love that this uses basic pantry stuff. The olive oil is subtle but makes a difference. Texture is chewy in a good way.
The instructions are clear, and the rise time worked for me. I especially liked covering with a towel after baking—kept them soft. 10/10.
Totally agree—covering them with a towel makes a huge difference. My first batch dried out a bit before I started doing that, so 10/10 advice!
Mine came out kinda tough. Maybe I baked too long, or I rolled them too thick—still tasted like bread and not like “pita” if you know what I mean.
Wow, these are way better than store-bought. I made 8 and ate 4 immediately 😅
I tried these once and mine didn’t puff—maybe my water wasn’t warm enough. If I ate 4 immediately I’d probably call that a success anyway 😅
That is such a satisfying compliment 😄 475°F really does puff them up. Did they stay soft after you covered them with the towel?