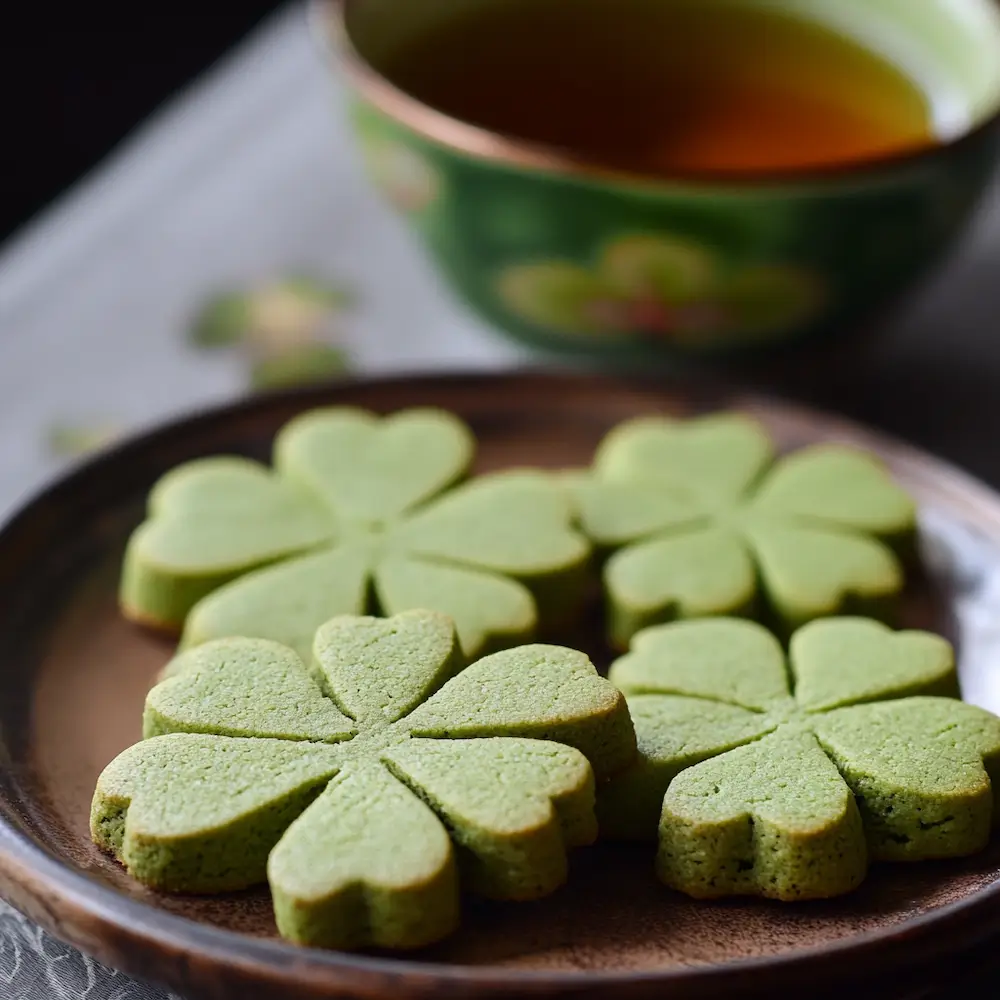
Shamrock sugar cookies are a festive and fun way to celebrate St. Patrick’s Day. With their cheerful green icing and playful clover shape, these cookies bring a touch of luck and a whole lot of sweetness to any March celebration. Whether you’re baking them for a holiday party, classroom treat, or just to add some seasonal spirit to your kitchen, they’re a charming and delicious choice that combines tradition with creativity.
At their core, shamrock sugar cookies are made from a buttery, soft sugar cookie dough that holds its shape beautifully when baked. This makes them ideal for cookie cutters, especially intricate shapes like shamrocks. The cookies themselves are lightly sweet and have a tender crumb, providing a perfect canvas for decorating. What really brings these cookies to life, though, is the icing. Whether you go with classic royal icing or opt for a simple glaze, a rich green hue adds instant St. Patrick’s Day flair.
These cookies are just as enjoyable to make as they are to eat. Decorating them can become a creative project for kids and adults alike, with endless ways to personalize each cookie. Add edible glitter, sprinkles, or even small gold candy coins to create a leprechaun-worthy treat. For a touch of elegance, you can pipe delicate white patterns over the green base, turning them into little edible works of art.
Shamrock sugar cookies pair perfectly with a cup of Irish breakfast tea, a cold glass of milk, or even a festive green punch. They make thoughtful gifts when wrapped in cellophane and tied with a ribbon, or lovely additions to holiday cookie platters. Because they’re so versatile and visually appealing, they often steal the show at gatherings and are guaranteed to spark smiles.
With their soft texture, sweet flavor, and festive charm, shamrock sugar cookies are more than just a treat – they’re a celebration of tradition, creativity, and a little bit of luck.
Ingredients
- 1 cup butter softened
- 1 cup granulated sugar
- 1 teaspoon vanilla extract
- 1 large egg
- 2 3/4 cups all-purpose flour
- 1/2 teaspoon baking powder
- 1/4 teaspoon salt
- few drops green food coloring optional
Instructions
- Preheat your oven to 350°F (175°C) and line a baking sheet with parchment paper.
- In a large bowl, cream together the softened butter and granulated sugar until light and fluffy. Add the vanilla extract and egg, and mix well.
- In a separate bowl, whisk together the all-purpose flour, baking powder, and salt. Gradually add the dry ingredients to the wet ingredients, mixing until just combined.
- If desired, add a few drops of green food coloring to the dough and mix until the color is evenly distributed.
- Roll out the dough on a floured surface to about 1/4 inch thickness. Use a shamrock-shaped cookie cutter to cut out cookies and place them on the prepared baking sheet.
- Bake in the preheated oven for 8-10 minutes, or until the edges are set but not browned.
- Allow cookies to cool on the baking sheet for a few minutes before transferring to a wire rack to cool completely.
Nutrition
These cookies are amazing! So fluffy and sweet. My kids loved them! Definitely a 5-star recipe.
I tried this but the dough was too sticky, I couldn’t roll it out. I think I put too much butter? My cookies turned out flat. 2 stars.
Yea, sounds like too much butter to me. My cookies were flat once too! Just need to follow the measurements, I guess. 👍
The dough was too sticky for me too! I thought I messed up, but it helped to add more flour. Maybe you can try that next time!
Do you really need food coloring? I mean, cookies taste the same without it, right? But okay, they look cute if you say so. 3 stars for the idea.
Yum! Shamrock cookies are a hit! Just in time for St. Paddy’s Day! 🍀 5 stars!!!
These cookies are so cute and taste great! I made them for a St. Patrick’s Day party, and they were a hit! 🌈
These came out sooo cute and buttery. I did add the green food coloring and the flavor is spot on. Perfect for St. Patrick’s Day.
Aww I love that! I’m making these for St. Patty’s too—question though: did the green coloring affect the taste at all or was it totally just the color? 🍀
These were super cute and the texture turned out great—soft in the middle with set edges. I used 6 drops of green and they looked exactly like a spring cookie should.
They really are spring-y! I love that you got the soft middle + set edges—mine always either spreads too much or browns too fast. Did you let them cool on the sheet the full few minutes?
I followed it exactly but my dough felt a bit dry and crumbly. I ended up adding like a teaspoon of milk to bring it together. Not sure if my butter wasn’t soft enough, but still tasty.
My cookies spread a lot and the shamrocks looked more like blobs 😅 I think my butter was too soft. Flavor is good though—vanilla really comes through.
Ahh yeah—if the butter was too soft, that usually makes them spread like crazy. Next time try chilling the dough 30–60 min before rolling, and maybe roll a tiny bit thicker than 1/4 inch.
My shamrocks also turned into blob monsters 😅 I think I underbaked once—8-10 min isn’t always enough depending on your oven. I’d try baking 1-2 min more and don’t move them until they firm up.
Not bad, but 1/4 inch is kinda thick? I rolled a bit thinner and they browned less. Still tasted great.
Followed the recipe but kids didn’t like them. They said too buttery. I think they too spoiled!
Too buttery? Nah, can’t be! Butter makes everything better! You just gotta teach them what’s good. 😜
Kids can be picky! Maybe try using less butter next time. Or maybe they just wanted chocolate chip cookies instead!
Yummy! I added sprinkles on top instead of food coloring. They look so pretty! 🌈
That’s such a fun idea! Sprinkles make everything better! 🌈✨
But aren’t the food coloring cookies supposed to be green? I don’t get it.
Can I just say, sugar and butter make everything better! I’m in love with these cookies! ❤️
I accidentally used baking soda instead of baking powder (oops)… they came out weirdly puffy and kinda flat. Still edible but not the intended vibe.
Oh nooo 😅 Baking soda vs powder really changes everything. Cookies can end up puffy then kind of collapse. At least they’re still edible—classic save! Next time double-check the label before mixing!
I’ve done that too. I think baking soda reacts way stronger, so you get weird texture. Maybe try chilling the dough next time? It helps with spreading.
Easy recipe, and I love that it doesn’t call for a bunch of weird ingredients. Mine needed like 10-11 minutes though—oven runs hot.
The dough was a little sticky until I floured my surface more. Still, they baked evenly and didn’t brown, which I appreciated. Next time I’ll do slightly less green coloring—mine turned almost minty-dark.
I tried this and my cookies spread a lot. I think my butter wasn’t soft enough? Also the edges browned even though I checked early.
It’s a nice recipe, but my cookies didn’t come out as fluffy as I hoped. What did I do wrong?
Tried this recipe but the dough was too sticky. Not sure what went wrong. 🤔
These cookies were a hit at the St. Patrick’s Day party! So yummy! 🍀
Yummy!! I swap butter for margarine and still pinchos de bien! 🍪💚
I substituted butter for margarine and they came out fine, I guess.
OMG these are so good! Even my dog wanted some. Just had to watch him closely 😂
Haha, that’s hilarious! Dogs have great taste 😂. You think they’d like the recipe too?
I accidentally used baking soda instead of baking powder (oops). They rose, but the texture was weird and not as tender. Don’t do what I did.
Why does it say “until the edges are set but not browned”? That’s so vague lol. I baked them, and they were either raw or too brown—couldn’t win. Flavor was okay though.
Honestly? I don’t get why they’re called shamrock—mine looked more like tiny potatoes 😅 But they tasted buttery and good.
Why use food coloring? Real shamrocks are green in nature! We should keep it natural. 🌿
These cookies turned out amazing! Soft and buttery, just like I hoped. Will make again for St. Patrick’s Day!
What’s a shamrock? Just make the cookies any shape! It’s all about the taste.
A shamrock is like those leaf thingies for St. Patrick’s Day, right? But yeah, cookies are good no matter the shape. 🍪
True! Who cares about shapes? Taste is what matters! Can’t wait to try these cookies!
These are sooo good! I’m def making them again.
Super easy! I made these with my kids and we had a blast. 💚
I don’t get why it says “few drops” of coloring—mine barely looked green until I dumped in way more. Then it was too green. Still yummy though. 😂
Honestly, I don’t even like shamrocks. But these cookies taste good. Surprising! 😅
I’m not a fan of green stuff either, but these cookies are surprisingly good! Glad you liked them! 😊
Yummy! But too sweet for me, maybe less sugar next time?
Less sugar? That sounds boring! Sugar cookies are supposed to be sweet! Just get used to it! 😆
I actually like them sweet! But I guess everyone’s taste is different. 😋
I followed the recipe exactly but my dough was a little crumbly. I think my butter wasn’t soft enough? Still tasted good though.
I made these last week, and they spread out too much. Should I have chilled the dough? Help!
The recipe is straightforward, but 2 3/4 cups flour seems like a lot for a soft dough. I ended up adding a splash of milk and it worked. Would make again with tweaks.
I think my cookies came out too dry. I followed the recipe exactly! What did I do wrong? 😔
Yum! Just made these and they’re delicious! Even the non-baking people loved them.
So glad you enjoyed them! They’re really easy to make, heh. 🍀
Simple recipe but very tasty! Couldn’t find shamrock cutter so I used a heart one. Still cute! ❤️
I dunno, using a heart instead of a shamrock? It feels wrong somehow. Maybe next time you should try harder to find the right cutter.
That sounds adorable! Heart cookies are a great alternative. Can’t wait to try this recipe!
These came out super cute and actually tasted like real “cookie” cookies, not just sugar. I chilled the dough for 20 minutes and they held their shamrock shape perfectly. Great for St. Patty’s Day!
I burnt mine and they tasted like charcoal. 😢
These are okay, but the vanilla feels a bit weak. Next time I’ll do more vanilla or add almond extract. Also, my cutter stuck to the dough—flour the cutter too!
Totally—1 tsp vanilla can get a little lost in sugar cookies. I usually bump it to 2 tsp, or add a touch of almond extract like you said (just a little so it doesn’t overpower). And yes, flouring the cutter helps a ton—my first batch stuck too 😅
I followed the steps and they spread way more than I expected. Maybe my butter was too soft? Still edible, just not perfectly shaped shamrocks.
Way too sweet for my taste. I think a cup of sugar is too much! Next time, I’ll cut it down.
I don’t understand why you’d need food coloring? Cookies are fine as they are. But, I guess some people like them colorful?
Simple and classic. I like that the instructions are straightforward. Also, parchment saved me from sticking disasters.
I followed it exactly and they were bland. Like, I know they’re sugar cookies but I wanted more flavor. Maybe my vanilla was old. Also 8 minutes wasn’t enough for my oven—edges stayed a bit soft.
Loved these! They made my kitchen smell so good. Will definitely make again.
YAS! Shamrock cookies are the best! My kids had fun cutting them out! 🍀
Just okay, I guess. Cookies are cookies…. Nothing special. Meh.
I don’t get why you would put food coloring in cookies. Isn’t that just for kids?
Food coloring adds fun! It’s not just for kids, it’s like making art!
I don’t understand why do you need food coloring. Cookies are tasty without looking weird. Just eat them!
I followed it pretty closely, but I think I over-floured when rolling—cookies were a little dry. Next time I’ll chill the dough first so it rolls smoother. Still tasty though, and the vanilla flavor is nice.
I dunno, 2 3/4 cups flour seems like a lot already. If you add more while rolling, yeah they’ll be dry. Maybe try using less flour on the counter or using parchment directly to roll?
That makes sense—over-flouring while rolling can definitely dry them out. Chilling the dough is such a good fix too. Glad they still tasted great!
The dough felt a bit dry when rolling. I added a tiny splash of milk and it worked out, but I’m not sure if that’s “correct.”
Way easier than I thought! Creaming the butter and sugar fluffy took a couple extra minutes, but it made a difference. Love the classic cookie vibe.
The “edges set but not browned” part is hard for my oven. I pulled them a minute early and they were pale—still tasty, just not the look I wanted.
That makes sense—“edges set but not browned” is super oven-dependent. I’ve had luck pulling them when the bottoms look just barely set and the tops still look a little soft, then letting them finish on the tray for 1–2 minutes.
Maybe your oven runs hot. Next time try 340°F and bake closer to 7–8 min. Also don’t crowd the pan—airflow matters. I know that line in the instructions is annoying 😂
Not the best cookie recipe I’ve tried. Mine turned out a bit dry. Maybe I’ll add more butter next time.
These cookies were a hit at my St. Patty’s party! The green color made them festive. Will make again!
I think I used too much flour. They puffed up way too much. I dunno what happened!
I followed the recipe exactly, but my cookies just didn’t taste good. I’m not sure what went wrong.
The dough felt dry after mixing—maybe I over-measured flour. I added a tiny splash of milk and it came together. Cookies are okay.
Simple ingredients, but y’all, I forgot the food coloring and they still looked great! 😂
My kiddo helped, so we basically made a science experiment with the green food coloring. But wow, the cookies turned out really pretty. They didn’t burn and the centers were tender.
Aww that’s such a cute way to make them! 🌿 I love that they didn’t burn—mine always run a little risky around 350°F. Tender centers too? You nailed it!
Made these for St. Patrick’s Day and they came out adorable. The texture is really nice—soft but not underbaked. I added a tiny extra pinch of salt and the flavor popped.
Green food coloring is optional, but I did it anyway and wow, it looks so festive. I might reduce the coloring next time so it’s not as intense.
Not bad! Mine spread a little more than expected, maybe I didn’t chill the dough. Still tasted great, and the shamrocks were super cute with the green coloring.
I was skeptical about these, but they turned out surprisingly well. Perfect for the season. 🌿
I’m glad to hear they turned out well! Perfect for St. Patrick’s Day! 🍀
These cookies were a hit at our St. Patrick’s Day party! So easy to make and super delicious! 🥳
The dough was a little sticky when I rolled it. I added a bit more flour and everything worked. Also, don’t overbake—8 minutes saved me.
Good cookies but my shamrock cutter kept sticking. I used parchment and still had to do some scraping 😅
I’m confused about “edges are set but not browned.” Like… do people pull them at like 7 minutes? I guessed and they were slightly pale, but honestly still good.
Wait… not browned at all? I’d think that means they’re raw. Mine always need like 10–12 minutes for color or they’re too soft.
I always pull them around 8 minutes. The “edges set but not browned” line confused me too—basically you want the cookies to look slightly underdone in the center and just starting to set on the outside.
I don’t get why people make these. No icing? Just sugar cookies with dye. Kinda boring to me, sorry.
I get what you mean, but I think these are more about the cookie itself than the icing. The green color is subtle, and they’re still really festive.
These turned out adorable! The texture is soft but still holds the shamrock shape. I used gel food coloring and the color was super even—definitely a St. Patty’s win.
“Shamrock sugar cookies” sounds cute but mine were bland and a little too crumbly. Wouldn’t make again.
I followed the recipe but mine spread a little too much. Flavor is good though—vanilla comes through. Maybe I needed colder butter?
These turned out super cute! The texture is perfect—soft in the middle and not overly sweet. I used a tiny bit more green coloring than suggested, but it was still evenly distributed.
Pretty good recipe. I was worried about the 1/4 inch thickness, but they baked evenly for me. Next time I’ll probably chill the dough a bit so the cutters don’t stick.
I’m not usually into food coloring, but the green color was nice. The dough was a bit sticky when rolling, so I added a tiny bit more flour. They still turned out great.
Mine always come out sticky too, even when I “measure right.” I usually just chill the dough 30 mins before rolling, but your flour trick sounds like it works. Did you add the color early or near the end?
Green food coloring honestly isn’t my favorite either, but I’ll admit the shamrock vibe helps 😄 Glad the extra flour fixed the stickiness—those doughs can be a little unpredictable.
Why is it 2 3/4 cups flour instead of 2 cups? I measured wrong and they came out dry. Had to add a spoon of milk to fix it.