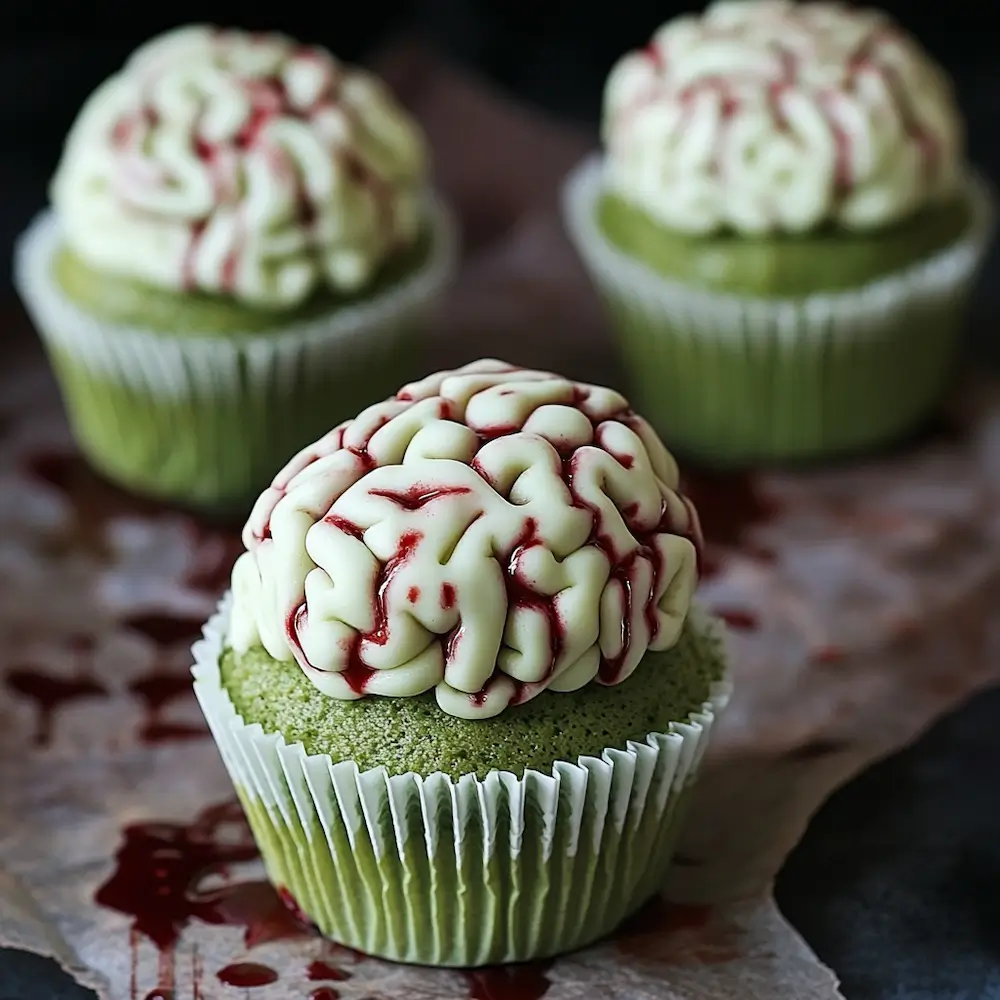
Green Zombie Brain Cupcakes are a creepy, playful, and delicious addition to any Halloween celebration. These spooky treats look like something straight out of a horror movie, with bright green frosting piped to mimic squishy brains sitting on top of moist cupcakes. While their appearance might send a shiver down your spine, their taste is anything but scary.
What makes these cupcakes such a hit is the combination of fun visuals and classic flavors. The cupcakes themselves can be any flavor you like chocolate, vanilla, red velvet, or something fruity. The real showstopper is the frosting. Tinted a vibrant zombie green, it’s piped in squiggly, brain-like patterns that make each cupcake look like a tiny edible zombie head. The process of decorating them is half the fun, whether you’re making them for a Halloween party, a classroom event, or simply for a spooky night in with friends.
The texture contrast between the soft, fluffy cake and the rich, creamy frosting adds to the enjoyment of every bite. Some versions even hide a surprise filling inside, red jam or strawberry sauce, to mimic a gory “brain matter” center that oozes out when you take a bite. It’s the perfect mix of creepy and clever that keeps guests talking.
These cupcakes are also highly customizable. You can go full zombie apocalypse by adding candy eyeballs, fake blood splatters made from colored syrup, or crushed cookie dirt around the base for an extra eerie touch. The possibilities are endless when it comes to making them as cute or gruesome as you want.
Beyond being a Halloween showstopper, Green Zombie Brain Cupcakes are fun to make with family and friends. Kids love helping with the piping and decorations, turning baking into a festive activity. Whether you’re throwing a haunted house party or just want to surprise coworkers or neighbors with a spooky treat, these cupcakes offer the perfect balance of fright and delight. They’re creepy, kooky, and absolutely delicious, everything a Halloween dessert should be.

Ingredients
- 1 and 1/2 cups all-purpose flour
- 1 cup granulated sugar
- 1/3 cup unsweetened cocoa powder
- 1 tsp baking soda
- 1/2 tsp baking powder
- 1/2 tsp salt
- 1 cup milk
- 1/2 cup vegetable oil
- 1 tbsp white vinegar
- 1 tsp vanilla extract
- 12 drops green food coloring
- 1 can vanilla frosting for decoration
- as needed black decorating gel for brain decoration
Instructions
- Preheat your oven to 350°F (175°C) and line a muffin tin with cupcake liners.
- In a large bowl, whisk together flour, sugar, cocoa powder, baking soda, baking powder, and salt.
- Add milk, vegetable oil, vinegar, vanilla extract, and green food coloring to the dry ingredients and mix until well combined.
- Evenly distribute the batter among the cupcake liners, filling each about 2/3 full.
- Bake for 18-20 minutes or until a toothpick inserted into the center comes out clean. Let them cool completely.
- Once cooled, use a knife or piping bag to spread or pipe vanilla frosting on each cupcake.
- Use black or red decorating gel to draw brain patterns on the frosting to complete the zombie brain look.
Not spooky enough!!! I wanted to see gooey brains, not just frosting. Disappointed.
The recipe said milk but I used water. Still turned out okayy. lol.
Haha, that’s hilarious! Water instead of milk? You must be a culinary rebel! 😂 I’ll have to try it that way sometime.
I didn’t have black gel, so I used chocolate sprinkles instead. Still looked awesome!
Why would you put vinegar in cupcakes? Sounds gross. I won’t be trying this recipe.
My kids had a blast making these! They are super easy and the black gel looks awesome. Will definitely make again!
That’s awesome to hear! I bet they loved getting their hands messy. I can’t wait to try it with my kids too!
Haha, my friends thought they were really creepy! I didn’t like the taste of the frosting, tho.
Yummy!! Me and my dog loved them!
These cupcakes are a hit at my Halloween party! So creepy and delicious! 👻🎉
Not gonna lie, the 12 drops of green food coloring felt like a lot at first, but it turned out great. I wish it told whether to add more if you want a neon look, but still solid.
I followed it pretty closely but mine came out a little dry—probably my oven runs hot. Still, the flavor is rich and chocolatey. Next time I’ll pull them at 17 minutes instead of 20.
I tried this recipe but my cupcakes turned out too dry. What did I do wrong?
Meh. I just wanted cupcakes, not zombie brains. lol.
Mine turned out kinda dry at the edges, and I’m wondering if 1/2 cup oil is too much or if I overbaked. Also my green color looks more “sickly” than “zombie” lol.
Oof—sorry! I’ve made these and I think the dry edges usually means they baked a minute or two too long (ovens run hot). I’d try pulling them closer to 18 minutes and rotate the pan halfway through. Also 2/3 full liners can dry out faster—maybe do a touch less next time.
I don’t think 1/2 cup oil is the problem. That amount is pretty normal for cupcakes. Mine were kinda “sickly” green too at first—try mixing the food coloring in really thoroughly and don’t under-mix the batter. If you used gel instead of liquid, that could change the shade.
These are so fun! I made them for a Halloween party and everyone loved them. Great recipe!
These sound cool, but isn’t making cupcakes messy? I don’t have the time for that.
I’m so glad everyone loved them! They were a hit at my party too! 🎃
Just a suggestion, maybe add some chocolate chips in the batter? Would make it even better. 😉
Yum!
I don’t know… 1 cup milk + 1/2 cup oil with vinegar just seems like too much liquid. Mine ended up greasy and the cupcakes sunk a bit. Brain gel saved the presentation though.
I get what you mean—1 cup milk + 1/2 cup oil sounds like a lot. But cupcakes can handle fat, so it might be more about mixing/bake time. Did you measure the flour by spooning into the cup or scoop-and-pack? That can make them sink/turn greasy.
Did you really need the food coloring? It just felt like a waste. Still tasted good tho.
I think the food coloring adds to the theme! It’s Halloween after all! 🎃
Good, but wish the flavor was stronger. Green is cool tho. 🍵
I had to leave out the food coloring bcuz I didn’t have any and they still came out super yummy. Will make again!
I dunno, isn’t the food coloring kinda important for the zombie look? But if they taste good, that’s cool, I guess.
That’s awesome! I’m glad they turned out yummy even without the food coloring. Sometimes simple is best! 😊