
Ingredients
- 4 Boneless pork chops (about 1/2 to 3/4-inch thick works best)
- 1/2 cup All-purpose flour (for the first breading layer)
- 2 large Eggs (lightly beaten)
- 1.5 cups Panko breadcrumbs (or regular traditional breadcrumbs)
- 1/4 cup Parmesan cheese (grated, optional for extra savory flavor)
- 1 tsp Garlic powder
- 1 tsp Salt (divided)
- 1/2 tsp Black pepper (divided)
- 1/4 cup Vegetable oil or canola oil (for shallow frying)
Instructions
- Set up a breading station with three shallow dishes. In the first dish, whisk together the flour, 1/2 teaspoon of salt, and 1/4 teaspoon of black pepper. In the second dish, beat the two eggs. In the third dish, mix the Panko breadcrumbs, grated Parmesan cheese, garlic powder, and the remaining salt and pepper.
- Pat the pork chops dry with paper towels. If they are very thick, you can gently pound them to an even 1/2-inch thickness with a meat mallet.
- Coat each pork chop in the flour mixture, shaking off any excess. Next, dip it into the beaten eggs, ensuring it is fully coated. Finally, press the chop firmly into the breadcrumb mixture so the crumbs adhere perfectly to the meat.
- Heat the vegetable oil in a large skillet over medium-high heat. You want the oil hot enough to gently sizzle when you drop a breadcrumb in it.
- Carefully place the breaded pork chops into the hot oil. Fry for 4-5 minutes per side until the crust is a deep golden brown and the internal temperature reaches 145°F (63°C).
- Remove the chops from the skillet and transfer them to a wire cooling rack or a paper-towel-lined plate to drain any excess oil. Let them rest for 3-5 minutes before serving for maximum juiciness!
Nutrition
Bring the Ultimate Golden Crunch to Your Dinner Table
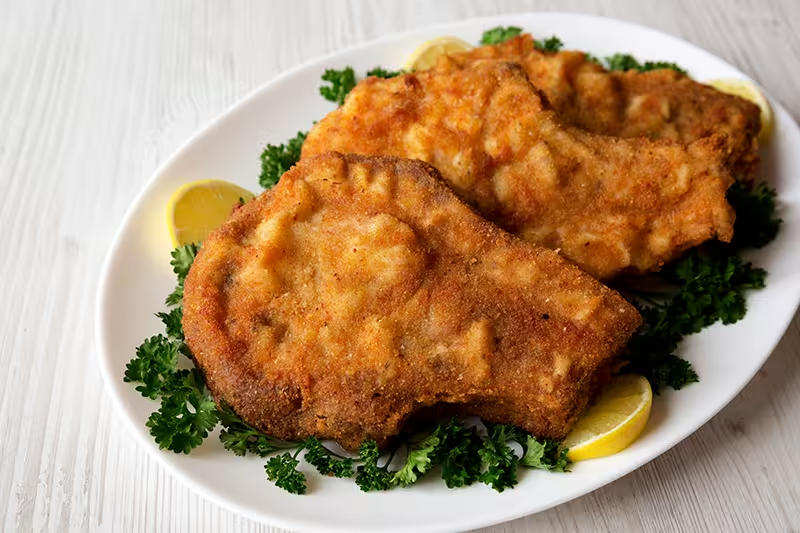
There is a profound sense of culinary nostalgia tied to classic, homestyle dinners. Few dishes evoke that feeling of comforting, family-table warmth quite like a perfectly pan-fried cutlet. The immense satisfaction of cutting through a thick, golden-brown crust to reveal steaming, tender meat is absolutely unmatched. If you have been searching for a foolproof way to recreate that iconic diner-style meal at home, you are in the right place. We are bringing that beloved crunch back to your kitchen with our ultimate guide. By mastering the traditional breading technique, you guarantee a spectacular, restaurant-quality crust that locks in every single drop of savory flavor.
Why We Adore Classic Breaded Pork Chops
Pork is a fantastic, incredibly versatile protein, but it reaches an entirely new level of deliciousness when coated in a seasoned, crispy shell. This classic preparation method does much more than just add texture; it fundamentally protects the meat during the cooking process.
Here is exactly why this hearty dish will become a heavy rotation in your household:
- The Perfect Texture Contrast: The satisfying, loud crunch of toasted breadcrumbs against the juicy, tender interior of the meat creates a deeply satisfying bite that appeals to adults and children alike.
- A Protective Moisture Barrier: Because pork is a lean meat, it can easily dry out in a hot skillet. The breading acts as a culinary shield, trapping the natural juices inside so the meat steams gently in its own moisture.
- Endless Seasoning Options: The breadcrumb mixture is a blank canvas. You can easily customize the flavor profile by adding grated Parmesan cheese, smoked paprika, dried oregano, or spicy cayenne pepper directly into the coating.
3 Secrets for the Crispiest Breaded Pork Chops
The most common frustration home cooks face when making this dish is a soggy crust or breading that completely falls off the meat and burns in the skillet. To ensure your Breaded Pork Chops have a flawless, tightly adhered, and beautifully golden exterior, you must follow these three essential frying rules:
- The Standard Breading Station: You must use the classic three-step system. First, dredge the dried meat in seasoned flour (which gives the egg something to grip). Next, dip it into beaten eggs. Finally, press the meat firmly into your panko or traditional breadcrumbs, ensuring every crevice is heavily coated.
- The Mandatory Resting Period: This is the ultimate insider secret! Once your meat is breaded, place it on a wire rack and let it sit for 10 to 15 minutes before frying. This resting period allows the flour and egg to hydrate and act like culinary glue, preventing the crust from detaching in the pan.
- Control Your Oil Temperature: Use a heavy-bottomed skillet and a high-smoke-point oil (like canola or vegetable oil). The oil must be shimmering but not smoking. If it is too cold, the breading will absorb the grease and become soggy; if it is too hot, the crust will burn before the center of the pork is safely cooked.
Perfect Pairings for Fried Comfort Food
If your family is completely obsessed with perfectly fried, golden-brown comfort foods, expanding your culinary repertoire to include different textures and proteins is a must. For an unforgettable Italian-inspired dinner party, serving up some gooey, crispy mozzarella arancini as an elegant appetizer is guaranteed to steal the show before the main course even arrives. Alternatively, if you need a quick, protein-packed option for busy weeknights that uses the exact same satisfying breading techniques, whipping up a batch of homemade chicken strips is always a massive hit with the kids.
When it comes time to serve, pairing your Breaded Pork Chops with classic, creamy sides is the best way to balance the heavy crunch. A mountain of buttery mashed potatoes, traditional macaroni and cheese, or a simple, crisp green salad dressed in a bright vinaigrette will round out the meal perfectly.
Grab your favorite skillet, set up your breading station, and scroll down to the step-by-step recipe below to achieve the ultimate golden crunch!
These are seriously the BEST pork chops ever! So crispy and tender. My whole family devoured them.
I gotta be honest, I used chicken instead of pork and it turned out fine. Still crispy. Just sayin’.
So easy to make! Even if you don’t cook much, you can do it. My kids loved them!
That’s awesome! I’m really glad your kids liked them! I can’t wait to try this recipe myself. Thanks for sharing!
I dunno, seems kinda basic. How can you mess up pork chops? Like, really, is it THAT easy? 🤔
Crispy! Yum! 😋
OMG this looks so good! Gonna try it this weekend! 😍
I tried this recipe but my breading fell off! 😩 What did I do wrong? Anyone have tips?
Just try again! Don’t worry too much, maybe the oil was too cool or you didn’t press the crumbs enough. There’s always a next time! 😊
Oh no! That happens sometimes. Make sure you’re pressing the breadcrumbs on really well. Also, let them rest after breading so they can stick better before frying!
Super easy recipe! I added some cayenne for a kick and it was fire!! 🔥
Meh. They weren’t bad but I’ve had better. Maybe too much garlic powder for my taste.
Are you kidding? This is the best way to cook pork chops! They came out juicy and perfectly crispy. So good!
Easy and delicious! I skipped the Parmesan. Didn’t have any but they still turned out great!
Made these tonight and they turned out way better than expected—super crispy. I used a rack to drain and that helped a ton. The 145°F tip is solid too.
Same here! I also used a rack and it really makes the crust stay crispy instead of getting soggy. 145°F was the key—no dryness.
These pork chops were amazing! The crust was super crispy and the flavor was on point. Will definitely make this again!
I’d give it a 1 because I don’t like pork. But I’ll admit, it looked nice. Good luck!
Not sure about the garlic powder. Seemed too strong for my taste. I prefer just salt and pepper.
I totally get you! The garlic powder can be a bit overwhelming sometimes. Just salt and pepper sounds good to me too.
Nah, garlic powder makes it better. Your taste is off if you think that, just sayin.
I tried this recipe but my chops ended up burnt. Future advice: dunk em quick!
These pork chops were amazing! The breading was super crispy and flavorful. Definitely a keeper recipe!
Yum! I added some Italian herbs to the bread crumbs and it turned out delicious. 😋
I tried this recipe and it didn’t taste as good as it looks. Maybe I did something wrong? Not sure.
Why do people put Parmesan cheese on everything? Just stick with the basics. Didn’t add any, still good.
My grandma used to make pork chops just like this, brought back memories. Thanks!
Sounds good, but isn’t frying bad for you? I’d rather bake them. Just saying…
I love hearing about recipes that bring back memories! Your grandma sounds amazing. Can’t wait to try these!
Had a hard time with the breading. It kept falling off. Anyone else? I couldn’t even finish them. Disappointed.
Won’t lie, I rushed the breading and the crumbs fell off. Also my pork was thicker than 3/4 inch, so it cooked uneven. Recipe seems fine—my bad.
Pork chops r good for health too right? I hope this helps my diet lol. #healthyeating
Crispy is overrated. I’d rather just pan-sear with garlic. But okay, I guess the breading is fun sometimes.
Yum! 🍽️
Good flavor, but my crust didn’t get “deep golden” until I lowered the heat a bit. Still tasty though. Next time I’ll let the oil fully heat longer.
I’m not sure about the panko + parmesan combo. It was good, but it felt a little salty? Maybe I used too much cheese. Otherwise easy process.